Fennel and Fruit Salad

Fennel. Beautiful fennel. How you terrified me at first. Your soft, feathery fronds perplexed me,  your delicately interwoven stalks intimidated. At first I played coy, stripping you down to your core and slowly braising with olive oil. But that first bite of roasted fennel served  alongside a fillet of salmon turned me into a fennel fiend. My dalliance quickly turned into a full fledged love affair.


There is something primordial about fennel. It looks like it came from another planet, a wild, untamed world. The bulb of the fennel plant is the sweet spot. Crisp and crunchy with a subdued licorice flavor, a hint of celery, fennel can beckon and entice. Most people prefer to saute or roast fennel, but I prefer to slice it raw and make  luscious salads.

Get out the mandolin slicer and set it on the thinnest setting. I love, love, love shaved fennel. Fennel can be a little tough when raw, slicing it paper thin makes light and tender. Now, I know I could eat this as is, but I have bigger plans for my fennel.

Fennel and Fruit Salad

 1 bulb fennel

1 Granny Smith apple

1 small apricot, pitted and sliced

1-2 Tblsp raisins

A pinch of salt

2 Tblsp yogurt

1 Tblsp sweetener (agave syrup or honey)

1 bunch sliced basil leaves


Tart green apples sliced paper thin make a wonderful pairing with fennel root. The sweet fennel counters the sour apple.

I found these beautiful mixed raisins at an ethnic market in town. They add the perfect sweetness to the salad. I added apricots because I had some on hand, but this salad could easily be made with fennel and apples alone.

Sweet, tart, crunchy, creamy.

Oh fennel, how I love thee.

Creamy Chickpea Salad

I have a confession to make. For nearly four years I was vegan. Yes, you heard me right, I just  dropped the “V-bomb”. During my early twenties I was one of those obnoxious, militant vegetarians who shunned not only flesh, but any and all animal products. I shook my fist at dairy of all sorts. Goodbye Brie, so long Swiss, see ya later Cheddar. I referred to eggs as “liquid chicken.” I stopped making my all time favorite breakfast of coffee and eggs over-easy and in exchange guzzled wheatgrass juice and algae smoothies and fists full of sprouts. I consumed my body weight many times over in tofu  and became all too familiar with the world of meat analogues (and if you ever need advice on meat analogues, I got some).

There are plenty of jokes and angry rants about the fascist-vegan-birkenstock-wearing-crunchy-granola-hippy stereotypes of herbivores.  I can understand where some of it comes from having been one myself.  There were times when I was overwrought with grief and confusion as to why anyone would slaughter another life simply to indulge their hedonistic whims that I acted out in embarrassing ways. For example,  I once smooshed a Reese’s peanut butter cup in my roommate’s hand out of sheer anger and frustration  (sorry, Lani). It was very rude.

Of course, times have changed and I realized that my life was on a completely different track when I caught myself on a Chicago rooftop bar scarfing a grilled bratwurst slathered in kraut. Veganism can be a tough sell in a culture of meat consumption. All of the dinners I was invited to that I couldn’t partake in, all of the baked goods brought to work that I couldn’t sample made for a very sad vegan indeed. Without a solid community of other vegans, I fell back into meat eating big time.

My former-vegan self still occasionally haunts me and one thing I learned from all those years of algae smoothies is this:  it just feels better to eat veggies.  I feel sluggish and lethargic after a heavy meat or dairy laden meal. I never, ever feel that way after, say, a carrot or an apple.  So I listen to my body and I give it those veggies and only on occasion do I let the little meat demon who sits on my shoulder have his way (and yes, he is made out of meat).

Creamy Vegan Chickpea Salad

14 oz chickpeas

1 large carrot, peeled and grated

2-3tbsp tahini

1 red pepper, chopped

1/4 cup chopped red onion

The juice of 1 lemon

1/2 bunch of parsley, minced

Salt and Pepper to taste

 Mix the ingredients in the bowl and voila!

This salad is a vegan’s dream, it’s rich in protein from the chickpeas, high in vitamin C from the peppers, beta carotene from the carrots, calcium from the tahini and it tastes awesome. The tahini in this recipe gives the salad the creaminess of mayo with no cholesterol. In fact, if you’re looking for an amazing plant food that mimics the creaminess of milk products, nuts and seeds are your best bet. They are fatty and silky and have that unmistakeably full bodied texture.  I’ve suffered from lactose intolerance since early adolescence and I can tell you first hand how tough it can be to go without cheese, mayo, milk or cream. I always keep tahini on hand when I want a robust, fatty flavor.

If you go to a barbecue this summer and/or  you meet a sad vegan, bring along a bowl of chickpea salad. They will probably give you a hug.

Rainy Day Romesco Sauce

The view from my bedroom window

One of the most frustrating things about food photography in my itsy bitsy apartment is the lack of natural sunlight. I have quite a few windows in the kitchen/living room space, but the surrounding buildings seem to block out the sun half the time and the other half of the time the abundant clouds and rainstorms keep me from taking bright, sunny photos.

It’s another rainy May day in Chicago and I’m stuck inside, but at least  my weekly grocery trip is out of the way and I’m stocked up for some quality time in the kitchen.

Some recipes turn out best when you have a little extra time. Romesco sauce is one of those lovely condiments that can be thrown together in a hurry (with roasted peppers from a jar) or painstakingly made at home, cooked low and slow until the flavors concentrate and the smoky aroma of capsicum and carmelized garlic fill the air. Whenever I find myself with an afternoon to spare, I like to take my time.

Fresh peppers, red bells and poblanos.

There are a number of ways to make romesco sauce, but the basic recipe includes roasted peppers (or dried ancho peppers), tomatoes, garlic, and toasted almonds. The almonds are the central ingredient that make this sauce more than just a peppery marinara. They add  creaminess and that unmistakable nutty sweetness of almonds.

Romesco Sauce

2 Red Bell Peppers, chopped

2 poblano peppers (or dried ancho peppers, soaked)

2-4 cloves garlic

1/2 cup almonds, roasted

1 cup chopped tomato

2 Tblsp smoked, sweet paprika

1 Tblsp red wine vinegar

1 Tblsp olive oil

salt and pepper to taste

Pre-heat oven to 400. Roughly chop peppers, add chopped garlic cloves and mix with olive oil. Spread on a baking sheet and bake for 15-2o mins until  the peppers are tender and slightly caramelized around the edges.  While the peppers are cooking, heat the tomato in a sauce pan on medium heat until cooked through.

I put the almonds in a spice grinder for 10 seconds or so and make a course almond meal. I find this make blending the mixture easier.

Once the peppers are done cooking, transfer to a blender. Add remaining ingredients and blend until smooth. I like to put it back on the stovetop and cook for a minute or two until thickened.

The smoky richness of romesco sauce pairs wonderfully with steamed or grilled vegetables like leeks, onions or eggplant. It’s also a perfect sauce for lean fish or spooned over mussels.

I found a bunch of scallions in my fridge that needed some perking up.

Steamed scallions and romesco sauce.

Perfect.

Time to go spend the rest of my rainy day lounging on the couch with a good book.

Beluga Lentil “Caviar” or How to Make an Elegant Appetizer for less than $5


Meet beluga lentils. A vegetarian’s best friend, these protein packed little gems are easy to cook, and uncannily similar in appearance to caviar. Beluga lentils or “black lentils,” can transform your next soiree into an elegant affair. Who needs to plunk down $100 for a can of salty fish eggs when you can have a heaping jar of nutty, flavorful lentils for around $2?

I’m the queen of thrifty eating. I’ve been known to get out the calculator and tally up the per serving cost of my daily meals. As far as deals go, lentils are a huge bang for your buck. They’re cheap and nutritious, high in protein, iron and vitamin B1, and (in my opinion) they taste great.

Beluga Lentil  “Caviar”
1 cup lentils
4 cups salted water
2 tblsp red wine vinegar
1 tblsp extra virgin olive oil
Salt to taste

Lentils require a 1:4 cooking ratio. This makes quite a lot of lentils. To half the recipe, simply use 1/2 cup lentils and 2 1/2 cups of water. Bring the water to a boil, add salt to taste. Add lentils and cook covered for 20-25mins. After lentils have absorbed the water, add vinegar and olive oil.

This simplest of recipes also works great on top of salads, as a side dish for fish, or mixed with rice.

I made this dainty appetizer with the lentil caviar, a dollop of creme fraiche and a sliver of sundried tomato as a garnish. Elegant enough for a dinner party, easy enough for every day eating.


Whether you’re vegetarian or simply on a budget, there’s no reason to feel like you’re skimping.

Tagged , , , , , ,

Sweet Beet Relish

Scrub a beet.

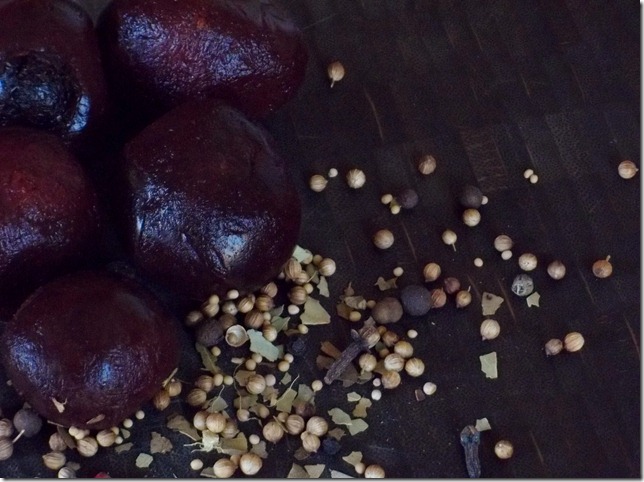
The deep red will color the white bristles of your vegetable brush. Scrub off the thin layer of earth, only later to find that its soil has penetrated the deepest parts of the flesh. Place the beet in a small pot of salted water to boil. The water will bubble and the beet will slowly bleed into the pot until it becomes like a single beating heart, thrusting against the rising currents. Pierce it with a fork and watch the juice bleed like a wounded soldier, or a knifed assassin, a melodramatic scorned lover of Shakespearean proportion. A freshly boiled beet, drained of its crimson liquid and placed steaming on a wooden cutting board is a thing of beauty.

Step away from it for a moment. Watch the steam rise and think of your own beating organ. Think of the shape, the heat of your own machinery. Palm the newly heated beet and feel the heaviness, swollen with hot water and now fleshy. Marvel over the sudden metamorphosis from hard knotted fist, to soft, delicate, meat.

Pickled beets are one of my favorite snacks. The brilliant vermilion color of the beets, dressed in a tangy brine, brighten up salads, rice dishes or meat entrees. They are certainly an acquired taste and I can honestly say that for the first 20 years of my life I HATED them. My experience of beets consisted of my mother slopping them out of the can, heating them in the microwave and serving with a pat of butter. They tasted like dirt and mold and all things unholy.


I refined my palette over time and now fresh beets boiled or baked or grated raw into a salad taste of  sugar and earth. It’s true that this humble root can take on a musty, dirt-like flavor if not properly prepared. Which is why I prefer eating beets with acidic ingredients like balsamic, lemon, salt or tart cheeses.

Sweet Beet Relish

      • 1-2 pounds of beets, boiled, peeled and diced. I think precooked beets work just fine, but avoid canned.
      • 1/2 cup orange juice
      • 1/2 large red onion, finely diced
      • 1-2  tbsp  pickling spices (or a mixture of mustard seed, juniper berries, clove, thyme and bay)
      • 2 Tbsps  brown sugar
      • 1 Tbsp salt (pickling salt or sea salt is fine)
      • 1/4 cup red wine vinegar
      • Cracked pepper to taste

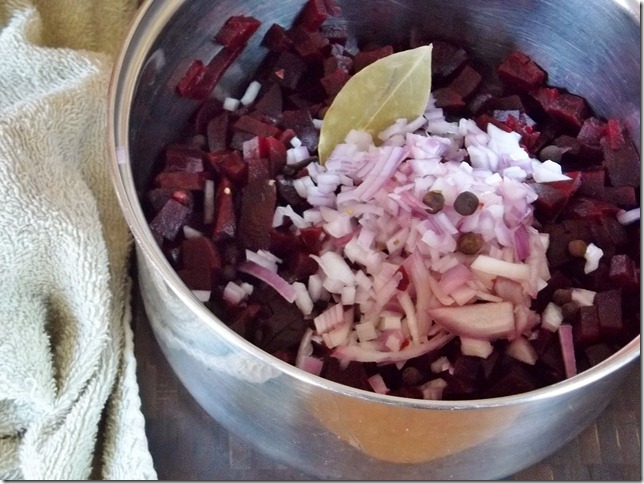
Put all ingredients into a medium sauce pan. Bring to a boil. Reduce heat and cover. Simmer for 20-35 mins until liquid had evaporated. Taste. You can make the relish sweeter or saltier if you like.

071

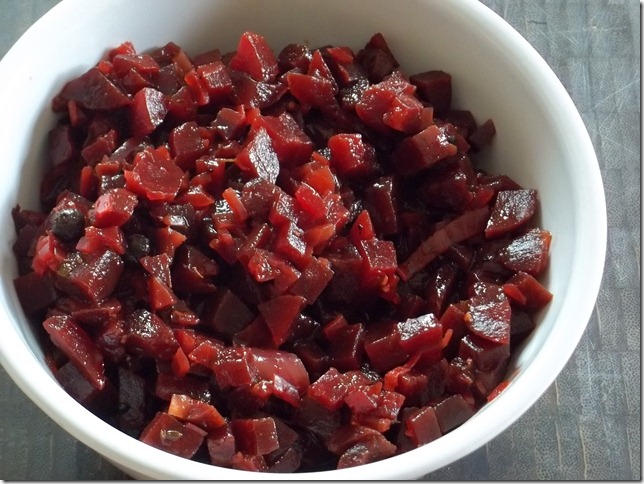
       The end result is a tangy, delicate pickle, more silky than  crunchy. It makes a colorful accompaniment to salads and you can use it on hotdogs and sandwiches in place of cucumber relish.  I like to enjoy this relish on toast with tea, but straight out of the bowl is good too.

058

Strawberry Matcha Daifuku

I’m admittedly a bit of a Japanophile.  In my spare time I love to study Japanese arts and I have followed Buddhism since my teens when I first read the poems of Gary Snyder and learned about The Lotus Sutra from reading Jack Kerouac’s Dharma Bums. The more I learn about Japanese aesthetics and culture, the more I want to immerse myself in the language, crafts and cuisine. So when I recently visited Chicago’s Chinatown I had to pick up some mochiko, or sweet rice flour, to make my favorite Japanese confection, daifuku.

Daifuku literally means “great luck” in Japanese and it consists of a chewy mochi cake stuffed with sweetened adzuki bean paste (anko).  I have only ever had pre-packaged, artificially colored daifuku, so I was excited to try an authentic homemade version.

I started with a basic mochi recipe that I found at About.com, and added a few tweaks.

The origional recipe can be found here.

Strawberry Matcha Daifuku Ingredients:

For filling:

  •   1 1/4 cups adzuki beans (or 1 14 oz can)
  • 1 cup sugar
  • 1-2 Tblsp cocoa
  • ½ tsp vanilla extract
  • katakuriko (potato starch) or corn starch for dusting
For Mochi:
  • 1 cup mochiko (glutinous rice flour)
  • 1/4 cup sugar
  • 2/3 cup water
  • 1/2 tsp sea salt
  • 1 tsp matcha powder


Preparing the anko paste was by far, the toughest part of this recipe. I couldn’t find a pre-made anko paste, so I decided to make mine from canned adzuki beans. I must not have drained the beans completely, because when I put them on the stovetop and added the sugar,  vanilla and cocoa (it should also be noted that cocoa and vanilla are not traditionally added to anko, I added them to mine because I adore chocolate and I found that the chocolate and vanilla added a wonderful depth of flavor) it quickly turned into adzuki bean soup. I mashed the beans into a fine paste until my upper arm muscles were bursting, but  still the mixture was very, very watery.   Anko paste should be thick, the texture of  putty or clay.  I wound up stirring my anko on medium heat for about 40mins until the water evaporated and it thickened  enough to handle. Even still, it was simply too sticky. Unfortunately for me I didn’t have any extra adzuki beans to thicken the paste with, so I had to suck it up and deal with my sticky anko.

Once the anko was prepared, I  rolled the paste into balls and refrigerated until firm.

If I had to do it again, I would make the anko the night before and give myself more time to make sure it reaches the right consistency.  My filling turned out quite lumpy and it made coating my strawberries  impossible. All of the instructions I found online said to make a “patty” from the anko ball, place the strawberry in the center of the patty and fold the paste over. However this just didn’t work for me. To begin with, some of my strawberries were a little moist and this made the anko slip right off the berry. I had to pat all of the strawberries dry and even then, my very sticky, lumpy anko would not adhere. I was frustrated, but eventually I got a few strawberries covered.

Once the strawberries were wrapped, I returned them to the refrigerator and let them chill.

Mochiko sweet rice flour for mochi.

The next step was to prepare the mochi dough. This was the easiest task in the entire endeavor, especially because it only required combining the ingredients and microwaving. I  could have  steamed the mochi on the stovetop, but  microwaving is more convenient and doesn’t  effect the texture or flavor of the finished product.

Beautiful matcha powder, the main flavoring in my mochi dough.

Matcha mochi dough before cooking.

I Combined the mochiko, matcha, sugar, salt and water and stirred until incorporated. I covered the bowl with plastic wrap and microwaved on high for three to five minutes.

The mochi dough was very sticky once cooked. Watch out because the sticky, burning hot mochi dough will cement itself to your hands if you don’t dust the dough with potato starch first. I learned this lesson the hard way and I have the blisters to prove it.

I divided the dough into 10-12 pieces. You really have to work quickly with the mochi as it hardens and becomes rubbery as it cools.

I formed the dough into balls and coated with potato starch.

Next comes the hard part, assembling the daifuku. I thought this would be relatively simple, but I was soooooo wrong.  To “fill” the mochi cakes, I did exactly what I did with the anko, flatten the mochi dough into a small pancake and placed it in the palm of  my hand. Next, I put the anko-wrapped strawberry in the center and pulled up the edges of the mochi, pinching along the top. I struggled with getting my mochi to cover the strawberry and anko paste kept squirting out the side of my mochi ball.  I also had trouble getting my mochi to flatten, the center would be very thin and the edges very thick, resulting in holes at the bottom where anko paste would then leak through. I can see how making daifuku takes a lot of practice and patience.

The final product was probably not as smooth and pretty as I would have liked it, but how did it taste? AMAZING! Really, the daifuku turned out wonderfully delicious. The mochi had a  perfect chewy texture and a balanced green tea flavor.  The anko paste was a bit gooey, but  very sweet and complimented the fresh strawberries.

It took a lot of time, trial and error (probably too much error), but I somehow managed to pull it off.

Tagged , , , , , ,

Welcome!

Welcome to Lemon Caper!

A food blog focused on natural foods cooked up in a tiny urban kitchen in Chicago.

I previously posted under the blog title The Sweet Beet, initially started as an experiment to see if I really wanted to focus my energy on a  food blog. I have learned so much over the last few years that I feel like I’m finally ready for something a little more streamlined.

To my readers from the previous blog, thanks for following me here.  I hope to work on putting out my best recipes and photos and continuing to learn more about photography, design and the world of gastronomy.  I intend to transfer over my favorite posts from the old site before  it’s retired forever.

A bit about me:

I grew up in the Sonoran Desert, a land of  cacti, palm trees,  prickly pears, tamales and really, really good Margaritas (I swear I didn’t have one until I was legal). Even though I lived within a vibrant food culture, I ate a lot of terrible, prepackaged foods for most of my childhood (spam…hotdogs…Tang…) I am not ashamed to say that I come from a background of poverty and malnutrition.  My low-income childhood meant that meals came sporadically and often at the hands of charity. I learned early on how to scrape together a meal from donated food boxes filled with canned beans and powdered soup mixes.  I know what it’s like to go without, to truly feel hungry and that experience informs my writing (as well as the Margaritas).

I am incredibly lucky  that through a lot of hard work  I was able to complete a post-graduate degree. During my years in college I independently studied nutrition and natural foods and made radical changes to my lifestyle.  I have tried every major whole foods diet, from lacto-ovo vegetarian to vegan to raw vegan. My diet consists mostly of whole grains, legumes, fruits, vegetables, nuts and seeds with minimal animal products (oh, and the occasional really, really, good Margarita).  I do eat meat, but rarely and  only when grass-fed, organic, free range meat is available. I limit my consumption of dairy because I am one of those lactose-intolerant nerds who has to carry around lactase enzyme tablets if I want to enjoy an ice cream cone.

Otherwise, I consider myself an adventurous eater. I like bold, piquant flavors. I’m all about heat. I love garlic, blue cheese, smoked fish, limes, chilies. Hence the name, “Lemon Caper.” Fresh, bright and a little salty.

Nice to meet you.